Showing posts with label butterfly. Show all posts

Monday, July 16, 2012

Dazzling Emeralds


Prior to the video I already removed the old design and prepped the nails with NSI superbond. Superbond is a great primer for those who suffer from lifting, myself and my mother included. Since I started using this, I rarely have lifting, and the lifting on my mums nails are not as severe as they used to be.
(The reason of our lifting problems is genetic, also very thin natural nails)


First off I start by brushing on a thin coat of IBD builder gel in clear and let that cure for 2 minutes.
This is my base layer.

vivalanails was so kind to send me this emerald glittercrushed shells and dazzling butterflies.
Thank you.

I mixed some emerald glitter with gel and with a gel brush, I brushed on some glitter to give it a gradient look. With a dotting tool I placed more glitter on the free edge to add more coverage.
With a rosewood stick I picked up the crushed shell and placed that randomly on the uncured gel.
The reason I did not cure the gel is : I now can push the crushed shell in the gel. If I were to cure the gel and then add the crushed shells, it would be on top of the nail, and that makes it unnecessary thick.
I let this cure for 2 minutes.

On the ringfinger I brushed on a thin coat of IBD builder gel clear and added 3 dazzling butterflies, and let that cure for 30-ish seconds, just long enough to lock them in place.

Then I brushed on the final coat of gel and filled the nail up with strings. These will land on the nails, exactly where I want them to be, and it will merge together leaving a smooth area.
I let this layer cure for at least 3 minutes, to make sure everything is hardened.

With a lint free wipe and none acetone nail polish remover, I removed the tacky layer and reshaped the free edge and sidewalls.
Lastly I put on some clear nailpolish, this one is Glosser from Orly, just to give it that bit extra shine.

I hope you like this design.


Sunday, June 10, 2012

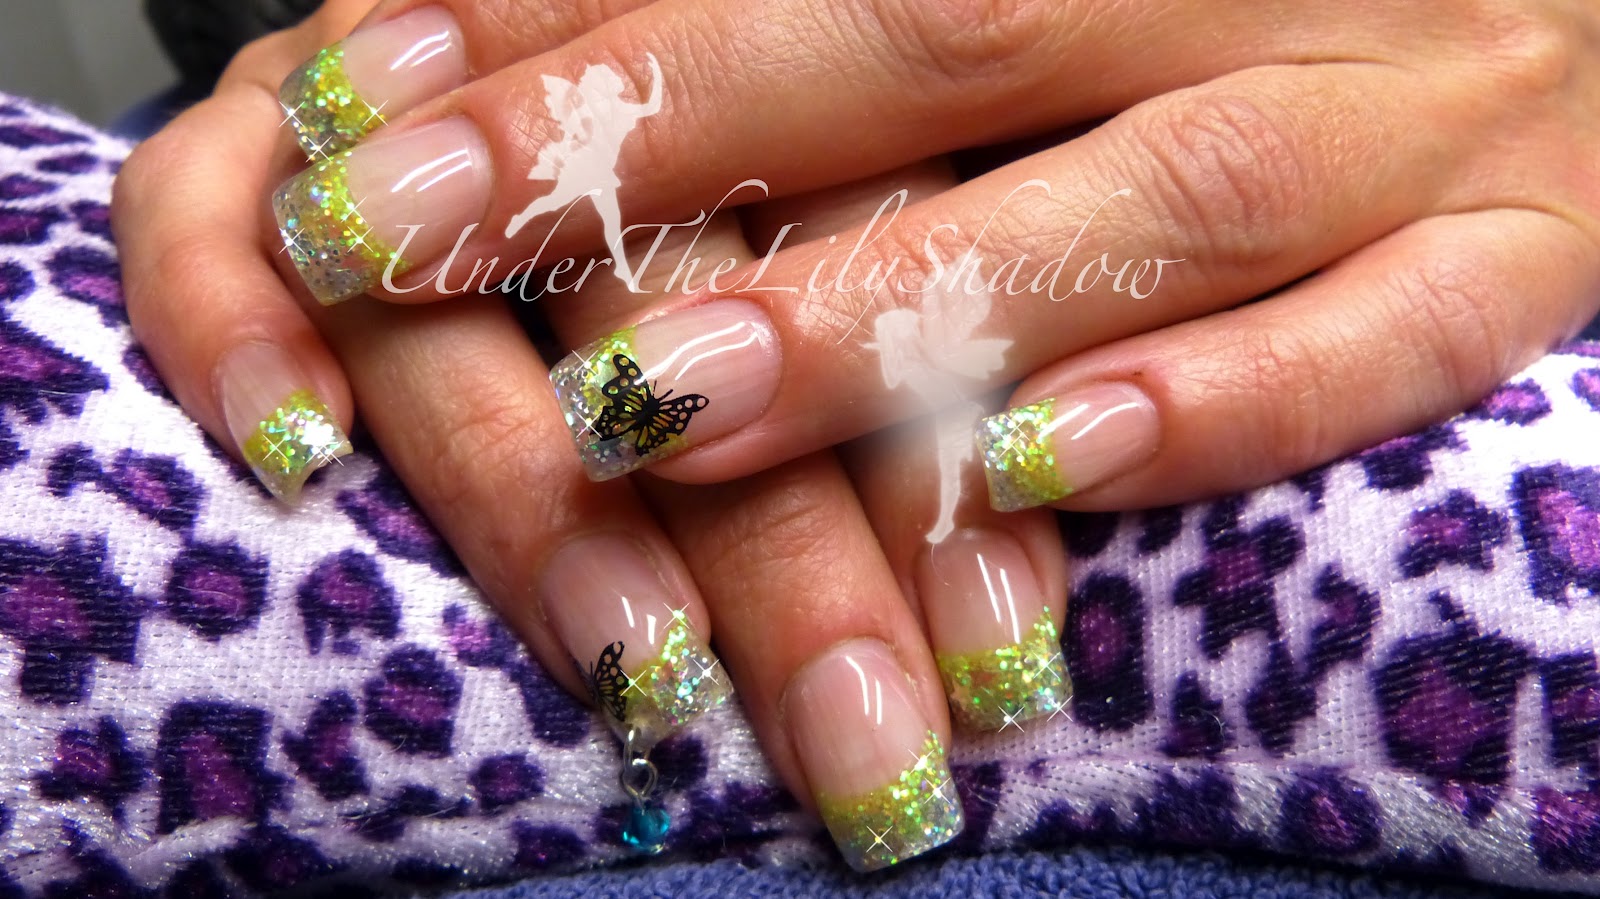
Enchanted Forest


I have already removed the previous design and prepped the nails prior to this video.

So let's get started.


In the video I start off by spraying the fingernails with IBD prep and I wipe it off with a lint free wipe. This removes any excess dust and oils from the nailplate to promote better bonding.

With NSI superbond primer, I prime the new nail growth.

Then I start forming the free edge with a silver mix that contains silver stars.
(I did not make it myself, I got it as a gift)
Above that silver, I place a very bright green color and form the smile line, fading the green down.
While the acrylic is still wet, I place a few iridescent stars on the green.

Then I go in with a second coat of NSI superbond primer, again, on the new nail growth only.

With NSI attraction Liquid and totally clear powder, I place a ball right behind the smile line, pat it from side to side and fade it down.
I put another ball right above the previous one and did the same.
To make sure the design on the free edge is completely encapsulated, I placed a small ball on the free edge as well, patted that from side to side and faded it up.
I did this to all 10 nails.

When all 10 were dry, I filed and shaped the nails how ever I wanted it, 
let my friend wash her hands (to get rid of any dust) and put some stamps on ringfinger and thumb.
With NSI Glaze 'n Go, I gave the nails a high gloss finish. This has to be cured for 2-3 minutes.
With cuticle oil, I conditioned the cuticles and last minute we decided to add a dangle.

Because it was late at night and the sun was set, I couldn't really take great picture or make a color-accurate end result.
But I did my best to find the best lighting available, and you can clearly see the difference.

I hope you enjoyed my little tutorial.


Wednesday, May 30, 2012

Summer Sorbet


Summer is coming!
When I think of summer I think of sorbet (sherbet for some?)

Allright, lets get it cracking.

After 5 and a half weeks, it's time for a new design.


In the video I start off by sanitizing and pushing back the cuticles.
She has much cuticles growth so I cut that off.

With an electric drill and a coarse drill bit, I drilled off the old design.
Being careful because a coarse drill bit is very sharp.

After that I went over it with a 100/180 file (used 180) to smooth out any bumps and also to remove the shine from natural nails. And I also reshaped and shortened the nails.

With IBD prep and a lint free wipe, I took away any left over dust and that also dehydrates.
With IBD natural nail primer, I primed the nails.

With IBD builder gel clear and a gel brush, I brushed on a thin coat and let that cure for 2 minutes.
On the free edge, I brush on a thin coat of IBD builder gel clear and start patting on the neon yellow glitter.
Then I pat on hot pink and formed a smile line, letting that cure for 2 minutes.
Camera made the colors less vibrant, and dull looking.
(pictures are true color)

Then I brushed on a thin coat of IBD builder gel clear and started filling up the nail with strings of gel.
Letting that cure for 3 minutes to make sure everything is hardened.
It is important to do each nail separately (one nails, cure, other nail, cure,...)
Or else the gel will run off.

When all 10 are done, I removed the tacky layer with none acetone and a lint free wipe.
With the soft side of a 100/180 file I file the sidewalls and free edge.
I did a stamp on ringfinger and thumb.
With a final coat of gel (only on ringfinger and thumb) I seal in the design, letting that cure for 2-3 minutes. 
I normally would have used regular nailpolish to seal in the design, but this person comes in contact with erosive products from time to time.
Removed tacky layer, applied topcoat and cuticle oil.
Took some pictures and I'm done.


Friday, April 20, 2012

☆★Gel Nails - Butterfly on ice ☆★


To achieve this design, I already removed the old design simply by filing it off with a 100/180 grit file.
And I have pushed back the cuticles and removed the shine from the natural nail.

In the video  I start off by dehydrating the nail with IBD prep and a lint free wipe, which also removes any excess dust and oils left onto the nail plate (which can cause lifting).

When that has dried, I applied NSI superbond (my mother is prone to lifting) on her natural nail only.
Then with my gel brush I brush on a thin coat of IBD builder gel in clear, as a base layer.
Went around the cuticles with a rosewood stick.
Cure that for 2 minutes.

With Jean Marin builder gel in Ultra white and a dotting tool, I start forming a smile line, for then to fill in the rest. With my gel brush, I clean up the smile line.
Letting that cure for 2 minutes.

Then I brushed on a bit of that clear gel on the free edge, for then to pick up a bit of blue glitter, to place that on the smile line, fading it a bit down toward the tip of the nail.
Letting that cure for just a minute.

Then it is time to build up the thickness and strength, and I do that by first brushing on a thin layer of IBD builder gel clear, and then building up the nail with strings of gel.
I go around the cuticle area with a rosewood stick and letting that cure for 3 minutes.

When all 10 nails are done, I remove the tacky layer with non acetone nail polish remover and a lint free wipe.
With a 180 grit file I file the sidewalls and the free edge.
Removed dust and stamped on a butterfly design.

To finish the nail off I used ORLY Glosser (careful not to smudge the stamp I just did)
Last but not least I rubbed on some cuticle oil and took some pictures.

I hope you like this design.
x