Showing posts with label nailart. Show all posts

Sunday, November 23, 2014

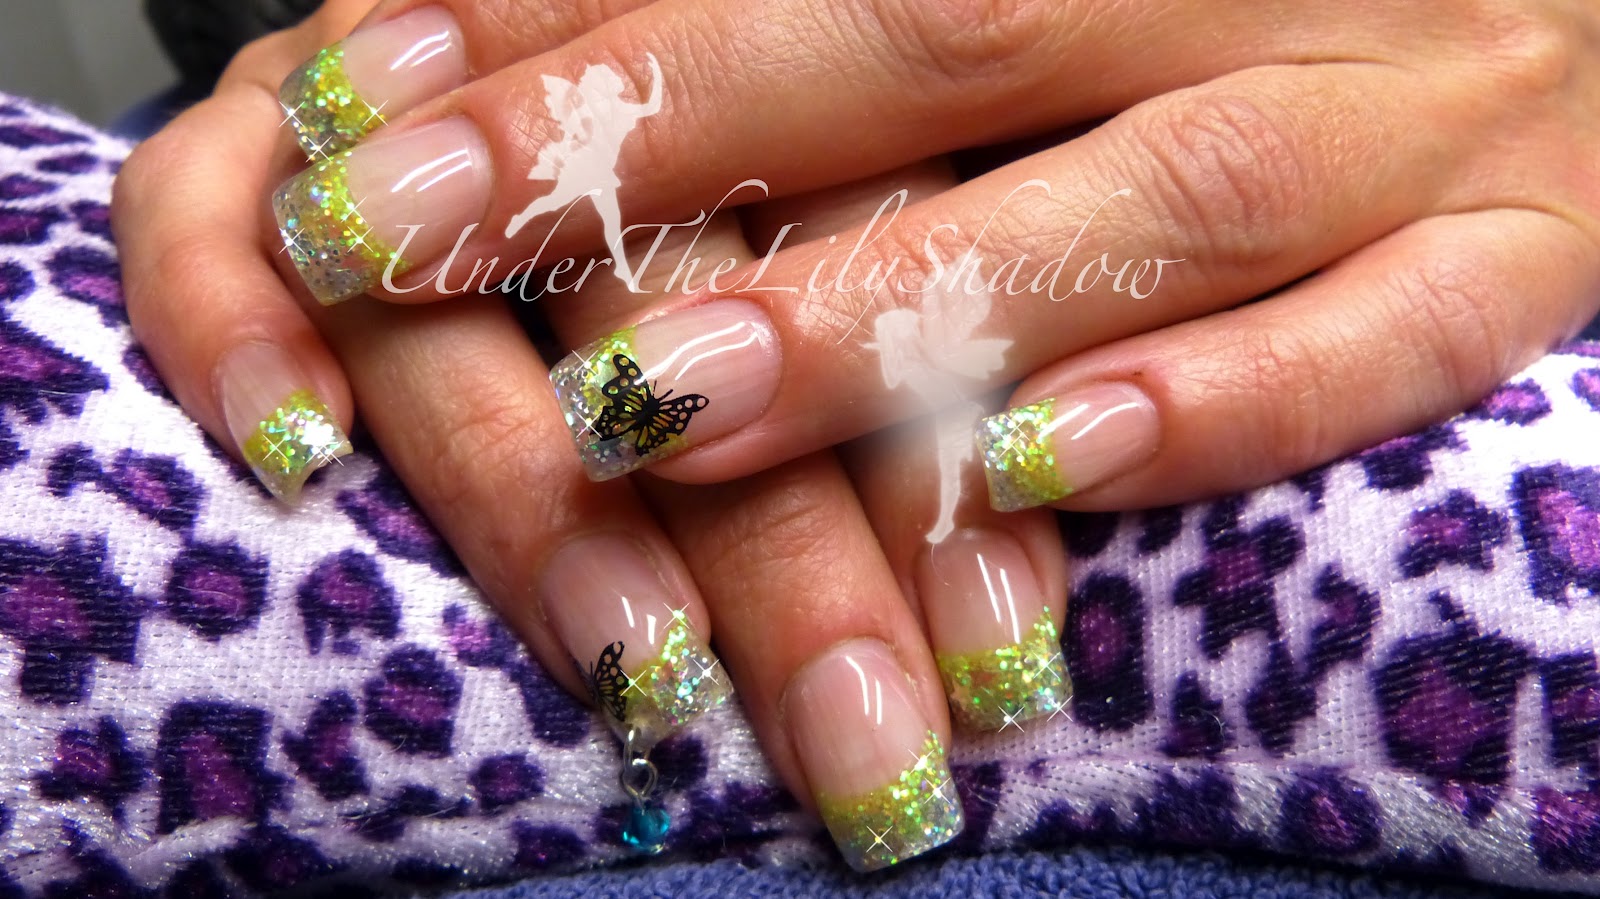
Nail piercing DIY


Nailpiercings have been in and out of trend, but sometimes I do like to wear them.
I will show you how to pierce your nail and how to make your own dangle.

Some FAQ's about nailpiercings:

Q: Will it get infected?
A: No! Not at all. The piercing doesn't go through any skin or flesh, it goes through the free edge of the nail. And which we all know, nails are made up out of keratin and dead cells.

Q: Does it hurt?
A: Only if you are squeamish about needles. No just kidding, it does not hurt at all. Does it hurt when you cut your nails with a trimmer?

Q: What happens to the hole when I take the piercing out
A: It will grow out as your nail grows, or if you want to get rid of the hole immediately, you just simply shorten your nail.

Q: Will this weaken the structure of my nails?
A: If placed in the right spot, it wouldn't.

Q: What if I get it caught on something?
A: Most likely the O-ring will open up and it will fall out. Worst case scenario... You'll end up with a severed finger and need to go to the E.R. (again, just a joke)

Anyway, let's get on with the step by step

The things you will need:
- 1 headpin
- beads / swarovski crystals / ...

- round nose pliers
- cutting pliers
- piercing tool

Take the headpin and put the bead on it. Let it slide all the way to the end.
With your round nose pliers make a bend 2-3 mm above the bead.


 Again, with round nose pliers, twist the wire around to create a loop.


 Then twist the wire around the base of the loop to close it off

With cutting pliers, cut off the excess wire. But don't throw it away, just yet.


With the piece you just cut off, you are going to make an O-ring. Place the wire on the round nose pliers and twist the wire completely around.


Cut off the overlapping piece of wire.


Open up the O-ring and put the dangle on.

Now it's time to pierce the nail. Grab your nail piercing tool. You can buy one in a nail supply store, or make one yourself out of a plastic handle and a small drill bit. 
Grab your finger and hold it into a death grip to make it doesn't want to bail out. Flip your finger upside down so that the nail faces the table. Place the drill on the underneath in one corner, far enough from the side and far enough from the edge. If you place the hole in the wrong place, you have a chance that the corner will crack off. Start turning the drill clockwise and put a little bit of pressure on it till you go all the way through. Twist anti clockwise to remove the drill from the hole.


When you have your hole drilled and your dangle ready, we will put them together.

Put the O-ring through the hole and grab each end with pliers and close it.


You can create all sorts of dangles, it doesn't have to be a crystal.

If you liked this DIY, don't forget to share it and I will see you next time!

Saturday, December 28, 2013

How to acrylic nails - 3D bow and red sparkles


3D bows never seem to bore me. They are pretty, sexy, classy and cute at the same time. It can go with almost any design. And the fun part is: They are easy to make when knowing how to work with acrylic. Sure it takes some practice but once you understand how it works, you will be able to create one perfect bow after the other. Handcrafted designs are much desired amongst nail lovers.


After removing the old design and doing prep and prime, I applied the red glitter mix the the free edge and spread it all the way across. To create a fade, I drag my brush upward trough the glitter towards the cuticle. Depending on how far you want your fade to be, you need more or less glitter.

Right before applying the clear acrylic to encapsulate the glitter and forming the nail, I applied a last coat of primer. While the primer is still wet, I applied a big ball of clear acrylic near the cuticle and held her hand in an angle so that it will run downward rather than up. This way prevents lifting problems.
Pat the acrylic all the way across from one side to the other and brush down. Because the ball is large, it should cover the whole area. If you feel like you need more acrylic in some places, you can always add more. The less you use, the less you have to file away. Don't forget to smooth out the acrylic to make filing much easier and faster.

When everything is dry, I filed and shaped the nail to the desire thickness and shape. (You know when the acrylic has hardened when you tap on it with the end of your brush and you hear a "tick tick tick" sound. If you hear a more of a muffled sound like "tok tok", you should wait a little longer)

At this point, I let her wash her hands with warm water and soap to get rid of any dust and residue chemicals.

Now for the fun part! For me personally, it is easier to create the opposite side of the bow first. For example: I am right handed, so I create the left part first. The reason being is: it's much more easy to get an almost exact copy of the left side.
So to create the left hand, I let her flip her hand so that her fingernails are pointing up. Doing this, the left side of the nail will temporary be on the right, making it easier to sculpt with my right hand. (It makes perfect sense in my head, so I hope you understand)

I picked up a small ball of white acrylic with a size 4 oval acrylic brush. On a paper towel, I drained the back of the brush to get rid of any excess monomer. I placed the ball on the right side of the flipped nail and wiped my brush to get rid of the left over monomer. I started pushing the ball in the middle towards the right, creating a flower petal. Depending on how big you want your bow to flair out, you press more and more upwards and downwards. To create the bow shape, I pushed in the right side to the left side. While the acrylic is setting, I keep on pressing lightly to ensure the shape of the bow will stay that way. When that bit is done, I flipped her hand back to normal so the bow on the right will now be on the left. And now you do the same on the right side to create the other part.

To get the center of the bow, also pick up a small ball of acrylic and drain the excess monomer. Place the ball in the middle and let it sit for a couple seconds. With tweezers, I put a Swarovksi crystal right in the middle and pushed it in. Not too hard, but deep enough so it will stay put. If the middle for some reason is not round anymore you can go around it with your brush.

When it has fully hardened, I applied a coat of glaze 'n go on the entire nail. Do NOT put any gel sealer on top of the crystal, or else it will not be sparkly anymore. I let this cure for 3 minutes.

Done!

Saturday, December 14, 2013

How to acrylic nails - Eyeball

Eye-catching nails? Yes we can. Pun intended.


After prep and prime, apply a nail form underneath the natural nail. Apply a medium side acrylic ball on the free edge, let it flow and pat it in place. With that ball you create the needed length.
Apply a second ball at the stress area and fade it upwards. This will prevent overfilling the nailbed when removing the design later on.

When it has completely dried, remove the form and shape the sidewalls and free edge. Also file the nail smooth for further application of the glitter. 

Apply a glitter color of your choice to the free edge and fade it up. I chose a nice bright pink.

Depending on which eye color you are going for, apply a ball of glitter acrylic somewhere in the middle of the nail where you want the iris to go. I keep the top somewhat straighter.

Using white acrylic, create the whites of the eye around the iris, giving them the shape that you want. I went for somewhat a rounder eye, but you can also go for almond shaped. I did not apply white acrylic above the iris.

Filing around the white acrylic will allow you to correct the eye shape to your likings and give it a more crisp look.

Apply a large size clear acrylic ball near the cuticle and pat it into place and stroking the acrylic down towards the middle. Apply a second ball at the free edge and stroke it up to blend in with the rest.

When everything is dry, it's time to file the sidewalls, free edge and the surface of the nail. After filing, buff the nail so that it would be easier to draw onto it. Remove all the dust with a wipe and some rubbing alcohol or in my case, IBD prep. If you have any dust left on the surface of the nail, the gel topcoat is more likely to bubble up.

With a calligraphy pen and black drawing ink, start drawing the pupil. Then outline the eye. When drawing the outline of the iris, I made the inside uneven with little lines to create the limbal ring.
Also don't forget to draw on some eyelashes.
To give a little spark to the eyes, apply two small dots. I used a silver pen to draw Christmas cards with.

When all the ink is dry, coat the entire nail with a gel sealer, I am using NSI Glaze 'n go. Let this cure for 3 minutes in a uv lamp. 

Hope you like it!

Sunday, December 8, 2013

Acrylic nails - Goddess nails

god·dess  (gds)
n.
1. A female being of supernatural powers or attributes, believed in and worshiped by a people.
2. often Goddess A female being believed to be the source of life and being and worshiped as the principal deity in various religions. Used with the.
3. An image of a female supernatural being; an idol.
4. Something, such as fame or wealth, that is worshiped or idealized.
5. A woman of great beauty or grace.


Sometimes, wearing beautiful nails makes us feel like a goddess. So why not goddess inspired nails.

The symbol of a goddess usually is a full moon with two crescent moons on each side. But I thought it would be fun to do it with a star, resembling a pentacle.

Ever since I was a little girl I was fascinated by mythical beings. A goddess being one of them is the inspiration for this nail design.


Enjoy!

Saturday, November 9, 2013

Gel nails - Late night thunderstorm


Now that the summer has made room for fall, we get less to none thunderstorms. That's one thing I love about the summer, the late night thunderstorms. I never feared thunderstorms and find the thunder and light play soothing. One day, thinking about new nail designs, my thoughts wandered off back to summer. I tried to transfer my thoughts to this nail design. The camera did not really pick the beautiful light play, but I hope you like it anyways.


After prep and prime, apply a thin layer of IBD builder gel clear. Without curing it, apply black glitter near the cuticle and let it fade down. Apply a dark purple glitter from the free edge up into the black. Go back and forth with the two colors to create a nice blend. Let it cure for 2 minutes.

Apply another layer of clear gel and put small pieces of yellow mylar flakes on the nail in a lightning bolt pattern. Let it cure for 2 minutes to secure the mylar in place.

Apply the last layer of clear gel and build the structure and overall shape with strings. Let it cure for 3 minutes.

Remove the tacky layer. Because the mylar may have left the nail with some bumps, you will file it smooth with a nail file. With the nail being somewhat rough, the black ink will show up much better and stay in place. Outline the yellow lightning bolt and let that dry completely.

Using a gel sealer, apply a thin layer on the entire nail and let it cure for 3 minutes. This doesn't have a tacky layer so you will be able to instantly rock these nails.


Saturday, October 26, 2013

Classy medallion nails

Don't we all love those beautiful 3D acrylic designs? But you have gel nails? You think you can't have some of that? Guess again ladies! Having some 3D acrylic art on your gel nails is easy. You still have the benefits of your gel nails but now also the benefits of 3D art. It is really easy. Let's have a look.


After prep and prime, apply a thin base layer on all 5 nails, one hand at a time. Go around the cuticles with a rose woodstick and let it cure for 2 minutes.

Apply a thin layer of clear gel on the free edge. This is the layer your glitter will adhere to. With a clean gel brush, apply the glitter on the nails. Wipe your brush between a paper towel to remove all the glitter and clean up your smile line. If you have 2 gel brushes, you can use one for patting the glitter on and one for cleaning up the smile line and for the whole gel application. After cleaning up the smile line, let it cure for 2 minutes.

Doing one nail at a time now, I apply a thin layer of builder gel clear on the entire nail. First the nailbed and last the glitter. Otherwise you will have glitter transferring onto your nailbed. After doing so, I am using the string technique to "build" the thickness of the nail. Go around the cuticle and let it cure for 3 minutes.

When all the nails are fully cured, I remove the tacky layer with none acetone nail polish remover and a lint free wipe. I also reshape the sidewalls and free edge.

Wherever you decide to do acrylic art is where you need to remove the shine of the gel nail. Acrylic needs those tiny scratches to adhere to. It has a tendency to pop off from something smooth and shiny and we want our art to last long. Make sure the nail is dust free.
Using NSI attraction radiant white, the same brand monomer and an acrylic brush, I picked up a medium size ball to create a circle shape on the nail. Keep patting the acrylic in place while it sets. When it's dry I used a stamp to create the zebra print.
I brush on a coat of Glaze 'n go on the entire nail and also on top of the medallion. Don't cure just yet, we need that coat to put our tiny pearls in. Just pick them up with a rosewood stick dipped in a bit of Glaze 'n go and arrange them around the medallion. Let it then cure for 3 minutes. Finish off the rest of the nails with a clear topcoat.

Tuesday, October 22, 2013

Nicki Minaj Nails

Sometimes we do design that are inspired by object, things we see, things we like. But also very often they are inspired by people and by the colors that they wear. This particular design was inspired by Nicki Minaj's I am your leader music video. The walls are green and the bathtub is purple.


Sunday, October 20, 2013

Alice in Wonderland

After prep and prime I applied a thin layer of IBD builder gel clear as a base layer and went around the cuticles with a rosewood stick. Letting it cure for 2 minutes.

On the free edge I applied a thin layer of the same gel and applied a gorgeous blue glitter. Also letting it cure for 2 minutes.

When all the nails are covered in glitter, it is time to build the nails. I am using the string technique.

Remove the tacky layer with a lint free wipe and none acetone nail polish remover. Reshape the sidewalls and free edge to get rid of any scratchy edges.

In order for the 3D flowers to stick better to the nails, I remove the shine with a soft buffer.

I picked up a tiny ball of white acrylic and placed it onto the nail. With my size 2 acrylic brush I start to form the flower petal. Repeating the same process over and over till you have as many flower petals as needed. The larger the ball of acrylic, the larger the petal.

In the center of the flower petal I placed a Swarovski crystal. And when all the flowers are made, I sealed the nails with NSI Glaze 'n go and let that cure for 3 minutes.


Monday, July 16, 2012

Dazzling Emeralds


Prior to the video I already removed the old design and prepped the nails with NSI superbond. Superbond is a great primer for those who suffer from lifting, myself and my mother included. Since I started using this, I rarely have lifting, and the lifting on my mums nails are not as severe as they used to be.
(The reason of our lifting problems is genetic, also very thin natural nails)


First off I start by brushing on a thin coat of IBD builder gel in clear and let that cure for 2 minutes.
This is my base layer.

vivalanails was so kind to send me this emerald glittercrushed shells and dazzling butterflies.
Thank you.

I mixed some emerald glitter with gel and with a gel brush, I brushed on some glitter to give it a gradient look. With a dotting tool I placed more glitter on the free edge to add more coverage.
With a rosewood stick I picked up the crushed shell and placed that randomly on the uncured gel.
The reason I did not cure the gel is : I now can push the crushed shell in the gel. If I were to cure the gel and then add the crushed shells, it would be on top of the nail, and that makes it unnecessary thick.
I let this cure for 2 minutes.

On the ringfinger I brushed on a thin coat of IBD builder gel clear and added 3 dazzling butterflies, and let that cure for 30-ish seconds, just long enough to lock them in place.

Then I brushed on the final coat of gel and filled the nail up with strings. These will land on the nails, exactly where I want them to be, and it will merge together leaving a smooth area.
I let this layer cure for at least 3 minutes, to make sure everything is hardened.

With a lint free wipe and none acetone nail polish remover, I removed the tacky layer and reshaped the free edge and sidewalls.
Lastly I put on some clear nailpolish, this one is Glosser from Orly, just to give it that bit extra shine.

I hope you like this design.


Tuesday, June 19, 2012

3D Flowers


This time I have the honor to use a glitter mix from Melbeautynails called "Mardi Gra"
It's a gorgeous gold and purple mix with all sorts of colored hexagons.

Prior to the video, I removed the old design and already prepped the nails.


First, I start off by removing any excess dust and oils from the nails with Nail pure plus and a lint free wipe.


With the "Mardi Gra" glitter mix (mixed with clear acrylic), I put a ball at the free edge, spread it from side to side and with the flags of the brush, I fade the glitter up towards the middle.
I am using a Nr. 6 acrylic brush.

Next I put on NSI superbond primer and with a Nr. 8 acrylic brush, I picked up a ball of NSI totally clear and placed that at the cuticle area, leaving a space between the acrylic and the cuticle.
I pat the ball from side to side and swipe it down towards the free edge.
If you need more acrylic, you can always add an extra ball.
It's better to add more than to take away.

This is the same for all 10 nails.

After shaping and filing, I let my friend wash her hands to get rid of any excess chemicals on her skin and dust from the nails.

For the 3D flowers, I put some pure acetone in the monomer to let the acrylic dry a whole lot faster.
(This is so your ball of acrylic won't get runny/too wet)
I think I use 40/60 acetone/monomer.
I am using a Nr. 2 acrylic brush, which tip comes together to a point.

Picking up small balls of acrylic can be tricky, so make sure to have a little practice.

I place a tiny ball of NSI radiant white on the nail.
I put my brush in front of a ball and start pushing my brush down to whichever side I want my petal to be. when you lift your brush and you petal starts to form a ball again, this means you have to wait a couple more seconds, because it's too wet.
You know when your ball is ready when it starts to get dull.
Depending on your Acetone/monomer ratio, it takes longer or faster to dry.

When I get 3 petals, I place a ball of acrylic in the middle immediately put a Swarovski crystal on top and pushed it in. The color is in "aurora borealis" (AB)
If you need to fix the appearance of the centerpiece, do so.

I created flower petals on each nail.

To finish off the nail, I put a coat of NSI Glaze 'n go on the nails (NOT on the petals)
and let that cure for 3 minutes.

And last but not least I massaged the cuticles with cuticle oil.

I really love this design, Thank you Mel for sending me this glitter mix.

I hope you liked this tutorial and thank you for reading/watching
x


Friday, June 15, 2012

Funky Leopard Print


Old design has already been removed. 


In the video I start off by dehydrating the nails with Nail Pure Plus, this also removes any excess dust and oils.
With NSI superbond, I primed the new nail growth.
With IBD builder gel clear and a gel brush, I apply a thin coat of gel and let that cure for 2 minutes.

With the same gel and brush, I apply a thin coat from the middle of the nail towards the free edge.
This is so that our glitters will stick.

With a clean brush (a brush that is wiped off) I pick up the bright green glitter and start patting that on the free edge, fading it up towards the top. And I let that cure for 2 minutes.
I did this to all 10 nails.
Once every nail has glitter and has been cured (to lock the glitter in place) I am brushing on a thin coat of that same gel, so that we have a somewhat smoother surface for our nailpolish/paint to go on.
I let that cure for 2 minutes.
Then I remove the tacky layer to do the leopard print.
If I were to leave on the tacky layer, my design would slip off if I brushed over it with a gel brush.

With China Glaze's "pool party" and a dotting tool, I start adding random spots to the nails
With Oumaxi's black acrylic paint and a dotting tool, I did the outline of the leopard print.

When all that was dry (about 5 minutes to be sure) I Brushed on my final layer of gel and filled it up with strings of gel to create strength and thickness. I let that cure for 3 minutes.

When all 10 are done, I removed the tacky layer, shaped the sidewalls and free edge, put on some Orly Glosser (top coat), let that dry and finally added some cuticle oil and rubbed that in.

This design can easily be done with acrylic and even nail polish :)
I hope you enjoyed this design and stay tuned for many more to come
x


Sunday, June 10, 2012

Enchanted Forest


I have already removed the previous design and prepped the nails prior to this video.

So let's get started.


In the video I start off by spraying the fingernails with IBD prep and I wipe it off with a lint free wipe. This removes any excess dust and oils from the nailplate to promote better bonding.

With NSI superbond primer, I prime the new nail growth.

Then I start forming the free edge with a silver mix that contains silver stars.
(I did not make it myself, I got it as a gift)
Above that silver, I place a very bright green color and form the smile line, fading the green down.
While the acrylic is still wet, I place a few iridescent stars on the green.

Then I go in with a second coat of NSI superbond primer, again, on the new nail growth only.

With NSI attraction Liquid and totally clear powder, I place a ball right behind the smile line, pat it from side to side and fade it down.
I put another ball right above the previous one and did the same.
To make sure the design on the free edge is completely encapsulated, I placed a small ball on the free edge as well, patted that from side to side and faded it up.
I did this to all 10 nails.

When all 10 were dry, I filed and shaped the nails how ever I wanted it, 
let my friend wash her hands (to get rid of any dust) and put some stamps on ringfinger and thumb.
With NSI Glaze 'n Go, I gave the nails a high gloss finish. This has to be cured for 2-3 minutes.
With cuticle oil, I conditioned the cuticles and last minute we decided to add a dangle.

Because it was late at night and the sun was set, I couldn't really take great picture or make a color-accurate end result.
But I did my best to find the best lighting available, and you can clearly see the difference.

I hope you enjoyed my little tutorial.


Wednesday, May 30, 2012

Summer Sorbet


Summer is coming!
When I think of summer I think of sorbet (sherbet for some?)

Allright, lets get it cracking.

After 5 and a half weeks, it's time for a new design.


In the video I start off by sanitizing and pushing back the cuticles.
She has much cuticles growth so I cut that off.

With an electric drill and a coarse drill bit, I drilled off the old design.
Being careful because a coarse drill bit is very sharp.

After that I went over it with a 100/180 file (used 180) to smooth out any bumps and also to remove the shine from natural nails. And I also reshaped and shortened the nails.

With IBD prep and a lint free wipe, I took away any left over dust and that also dehydrates.
With IBD natural nail primer, I primed the nails.

With IBD builder gel clear and a gel brush, I brushed on a thin coat and let that cure for 2 minutes.
On the free edge, I brush on a thin coat of IBD builder gel clear and start patting on the neon yellow glitter.
Then I pat on hot pink and formed a smile line, letting that cure for 2 minutes.
Camera made the colors less vibrant, and dull looking.
(pictures are true color)

Then I brushed on a thin coat of IBD builder gel clear and started filling up the nail with strings of gel.
Letting that cure for 3 minutes to make sure everything is hardened.
It is important to do each nail separately (one nails, cure, other nail, cure,...)
Or else the gel will run off.

When all 10 are done, I removed the tacky layer with none acetone and a lint free wipe.
With the soft side of a 100/180 file I file the sidewalls and free edge.
I did a stamp on ringfinger and thumb.
With a final coat of gel (only on ringfinger and thumb) I seal in the design, letting that cure for 2-3 minutes. 
I normally would have used regular nailpolish to seal in the design, but this person comes in contact with erosive products from time to time.
Removed tacky layer, applied topcoat and cuticle oil.
Took some pictures and I'm done.


Sunday, May 13, 2012

Gel on ToeNails


My mom bumped her toe pretty hard to something, and she lost a corner of her nail and it bled a bit. a week later when it was quite healed I decided to put some gel on because the weather is getting better.
So prior to the video I already prepped the nails (pushed back cuticles and took away the shine of the natural nails.


I sprayed her toes with IBD prep and went over it with a lint free wipe to get rid of any excess dust and oils.
With IBD natural nail primer, I primed her toenails.
With IBD builder gel clear and a gel brush, I brushed on the first layer of gel, and started to reconstruct a free edge for her big toe,  went around the cuticle with a rosewood stick and let that cure for 2 minutes.
The rest of the toes go just like normal, a thin coat of IBD builder clear and cure for 2 minutes.

With a dotting tool, I picked up some white gel and started for forming the smile line and free edge.
With a clean gel brush, I cleaned up the smile line and let that cure for 2 minutes.

For the last layer of gel, I brushed on a thin layer of IBD builder gel in clear, and filled the nail up with strings of gel, and in a circular motion, letting the gel on the brush touch the gel on the toe, I spread out the gel evenly.
On the toes, you don't need a thick layer.
I let that last layer cure for 3 minutes.

When all the toenails are done, I removed the sticky layer with nail polish remover and a lint free wipe, and filed the sidewalls and free edge.

I did some nail art on her big toe, it's a rose done with stamping polish, an image plate and a stamper.

Then I applied a coat of UV nail polish (not cured in the lamp) to prevent the nails from yellowing.

Last but not least, I applied some cuticle oil and rubbed that in, took some pictures and done .